First, it is necessary for you to download, install and run the software.
Step 1: Add files before FLV to iPad conversion
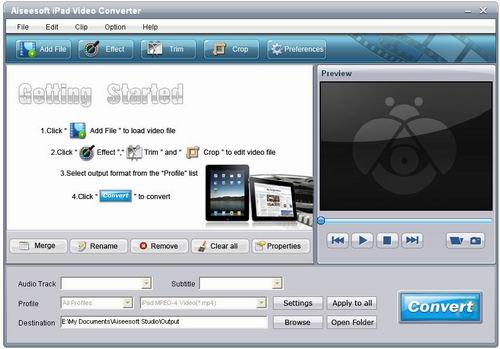
After launching the FLV to iPad Converter, click the "Add File" button to add the FLV file which you want to convert.
Step 2: Choose profile and destination
Aiseesoft iPad Video Converter provides you with powerful converting functions which allow you to enjoy whichever popular video format to iPad. Under “Profile”, click the drop down arrow and choose the output format from the list as you need. Click “Browse” to find a folder to place the output file.

Also you can choose audio track and subtitle.

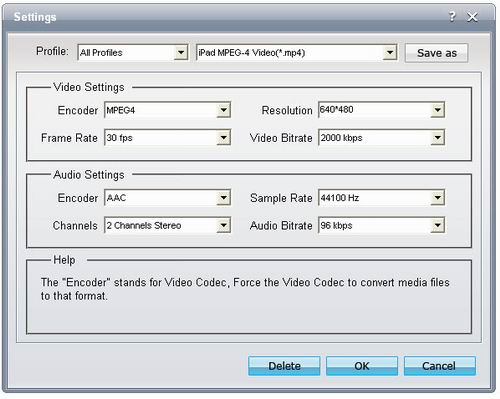
Step 3: adjust settings
In addition, Aiseesoft FLV to iPad Converter allows you to do further settings to enrich your videos, such as video Encoder, frame rate, audio Channels and more parameters before converting.
Before converting the FLV video, maybe you want to add a watermark to your video. Don’t worry; this video editor will help you. In the editing interface, you can easily find the “Watermark” function.
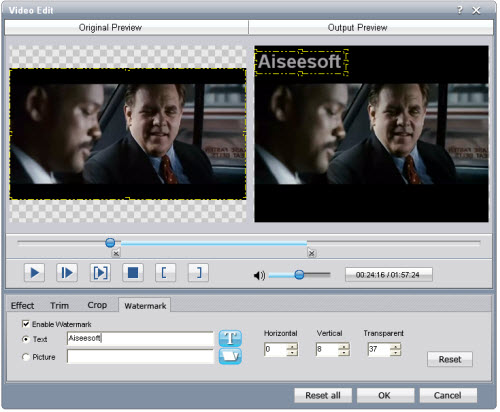
This video editor provides you with two watermark forms- text and picture. You can input whatever you want in the Text input frame or select your preferred image. Then you can adjust the position and transparency of the watermark.
Of course, there are other editing functions, such as trim, crop, merge, etc., for you to apply.
Step 4: Convert FLV to iPad
Click button to start the FLV to iPad conversion process.
没有评论:
发表评论