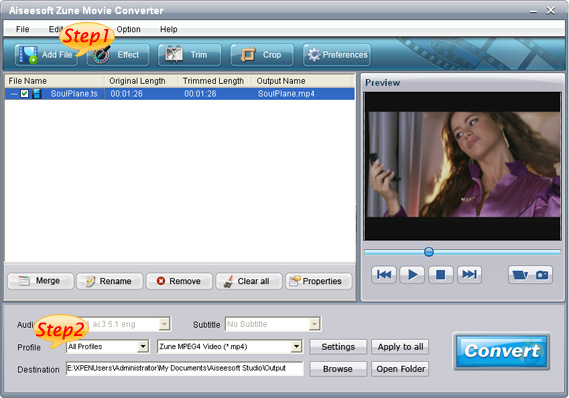
Step 1: Add File
Click the “Add File” button to import video or audio files, you can also click the "File" menu to open the following drop-down menu, then select "Add File" to import files.
Step 2: Output video settings
Select the output video format you need from the “Profile” drop-down list. Click “Settings” button to set your video and audio parameters.
Step 3: Start Conversion
Click “Start” button to start your conversion and it will be finished in a short while.
Tips:
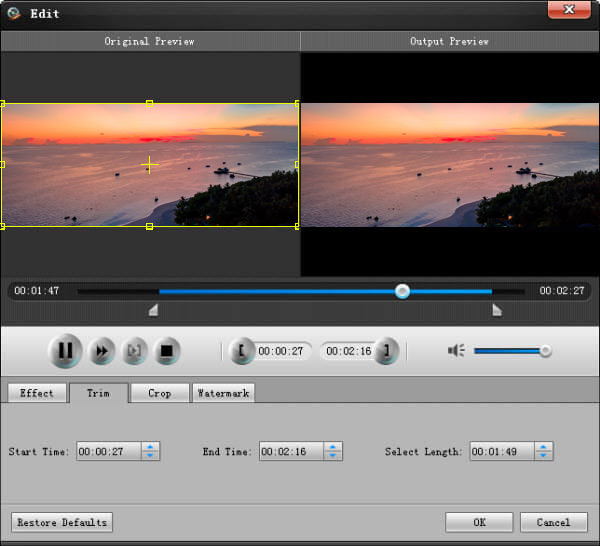
1. Trim Movie
If you just want to convert a clip from your movie, you can click the “Trim” button to open the Trim dialog, you can trim a duration of the video by either dragging the Start Time and End Time sliders or setting the time parameters in each corresponding field.
After you set the trimming time, the length of the captured clip will be shown in the Select Length box for your reference.
2. Video Crop
With Aiseesoft Zune Movie Converter you can remove the black edges around your movie video by checking the “Crop” option and customize your movie.

There are three methods available to crop your video:
Method 1: Crop by selecting a crop mode
Select a crop mode in the crop mode drop-down list and click OK to save the crop. There are three pre-set crop modes
for your choice: No Crop, Cut off top and bottom black edges, Cut off top black edge.
Method 2: Crop by adjusting the crop frame
The crop frame is the dashed line around the movie video. There are four adjustment lines on the crop frame. Each line allows you to crop the movie video from a different position.
To crop your movie video, you can just move your mouse cursor to an adjustment box and drag the crop frame.
Method 3: Crop by setting the crop values
There are four crop values on the lower left part of the crop window: Up, Down, Left and right. You can set each value to crop your movie video, and the crop frame will move accordingly.
Before you start to crop your movie video, you can select an output aspect ratio from the Zoom list. There are four choices available: Full screen, Keep original, 16:9 and 4:3. After you select an output aspect ratio and finish the crop, the result can be previewed in the Preview window of the program main interface.
3. Capture your favorite image and merge several videos into one file
If you like the current image of the video you can use the “Snapshot” opinion. Just click the “Snapshot” button the image will be saved and you can click the “File” next to “Snapshot” button to open your picture. You can select the destination of the picture by clicking the “Preference” button. As default the captured image will be saved at: your \My Documents\Aiseesoft Studio\Snapshot
If you want to merge the selected video files into one output file you can check the “merge into one file” option. As default the merged file is named after the first selected file (either a title or a chapter)
没有评论:
发表评论