This is a tutorial which explains the process of editing videos on a PC using Windows Movie Maker and editing videos on Mac using iMovie. This tutorial will be a concise explanation of how to editing videos for free. Then share your movie via the Web, e-mail, or CD. Using dvd burner you can even take movies you've made and turn movies into DVDs.
You can also save your movie back to the video tape in your camera to play back on a TV or on the camera itself.
This tutorial includes three parts, this is part one:
Part 1. Using Windows Movie Maker to edit videos on PC for free
Part 2. Using iMovie to edit videos on Mac for free
Part 3. A table that compares free video editors.
Windows Movie Maker 2.1 makes home movies amazingly fun. With Movie Maker 2.1, you can create, edit, and share your home movies right on your computer. Build your movie with a few simple drag-and-drops. Delete bad shots and include only the best scenes.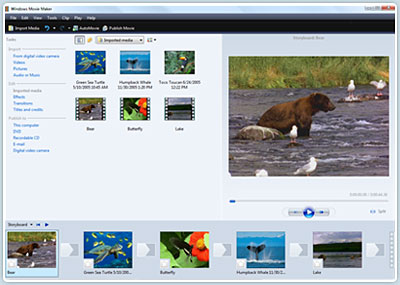
Step 1, Capture video
You can capture video from video device, import video, pictures, audio and music. MM2 will allow you to import the following file formats:
- Audio files: .aif, .aifc, .aiff .asf, .au, .mp2, .mp3, .mpa, .snd, .wav and .wma
- Picture files: .bmp, .dib, .emf, .gif, .jfif, .jpe, .jpeg, .jpg, .png, .tif, .tiff, and .wmf
- Video files: .asf, .avi, .m1v, .mp2, .mp2v, .mpe, .mpeg, .mpg, .mpv2, .wm, and .wmv
If your videos are not the formats compatible with Windows Movie Maker such as MP4/3GP, FLV and MOV, MIDI, AIFF, AAC, you can use the video converter to convert the video to the formats supported by MM2 first.
Step 2, Edit movie
-Add Video Transitions.
Open your Windows Movie Maker project file. If Movie Maker opens in Timeline view, return to Storyboard view by clicking on the Show Storyboard link. From the Movie Tasks pane, under Edit Movie, select View video transitions . Choose the desired transition, select and drag into storyboard between desired clips. After inserting transition, sample the change in the Monitor to determine if it works in the way you desire. To change a transition you can Undo the action, right click on the transition in the Storyboard and select delete, or simply drag a new transition over the old transition.
-Add Video Effects.
Choose "View video effects" under the Edit Movie section and drag the chosen effect to the star in the lower left corner of the picture. Preview your movie to see the effects. Continue to add effects to other pictures if desired. Save the file. A video effect applies to the picture itself rather than the change from one picture to another as in a transition.
-Add Titles and Credits.
Under the Edit Movie section, choose Make titles or credits. You have several options for where to place your Windows Movie Maker title and credits. They may precede or follow a picture or video clip, or be used as an overlay.
Here are tips for you to add special effects to your movies using Windows Movie Maker
Step 3, Finish movie
Now that your movie is complete, you may wish to save the project in a different format.
Saving the project and saving the movie are two different things. The movie project is the working file so that you may continue to edit until you have a final version of your work completed. The movie file is the final output of your movie.
Windows Movie Maker compresses all the parts of your movie into a single unit. The file size is much smaller so that it can be used on a web site or emailed.
You also have the option to create a CD or DVD of your movie. These options are all under the heading Finish Movie. If you want to convert the movie made by Windows Movies Maker to other video format such as YouTube video, AVI, MP4, 3GP, you can use this video converter. You can also use free third-party software to burn the movie made by Windows Movies Maker to DVD for free.
没有评论:
发表评论