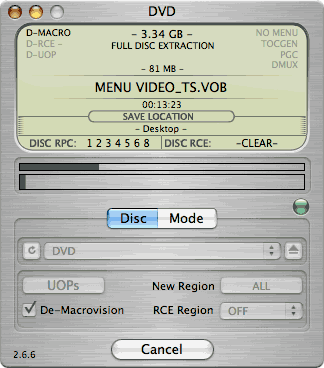
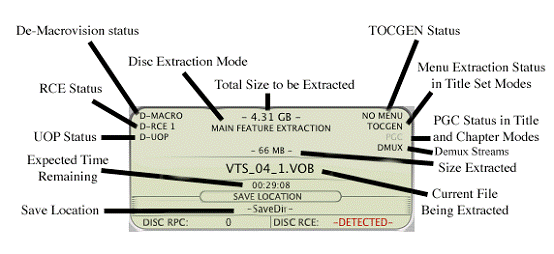
Mac The Ripper is a free DVD ripper (extractor) for Mac OS X. It can extract commercial DVD movies to your hard drive, minus all the copy protections and region controls put in place by DVD publishers. Mac The Ripper removes CSS encryption, Macrovision protection, and sets the disc's region code to '0' for region-free by default, and is capable of removing RCE region protection as well, making an unrestricted copy of any DVD movie you own. It doesn't rely on the DVD drive to get the CSS decryption keys, so that means that you do not need to play the DVD with DVD Player in order to rip it to your hard drive unprotected. MacThe Ripper is also capable of removing UOPs, or User Operation Prohibitions, which are the settings that prevent you from skipping or fast-forwarding certain parts of DVDs, such as FBI warnings, previews, logos, intros, etc. Mac The Ripper is also able to extract discs with the new ARccOS protection, as well as DVDs that have been damaged or improperly mastered.
WARNING: Disabling UOPs can break the navigation on certain DVDs. If you disable UOPs, be sure to verify the DVD with DVD Player before you burn it to DVD±R disc.
Step 1. install MacThe Ripper
Download it from: http://www.Mactheripper.org. To install Mac The Ripper, simply mount the .dmg archive by double-clicking it, and copy the Mac The Ripper application from it to your Applications folder (or wherever you want it ), along with this Mac The Ripper Manual if you need it.
Step 2. convert DVD for free
To use Mac The Ripper, you should insert your DVD movie into your DVD drive and launch the Mac The Ripper application. Then, you should set the RCE options if applicable. If Mac The Ripper displays 'DISC RCE: -CLEAR-' after scanning the DVD in the drive, you can leave the 'RCE Region' popup menu on 'OFF', as it is by default. Only (and always) set the 'RCE Region' to 'OFF' when it says that RCE is '-CLEAR-'.
Once you've selected the type of extraction and options you want, you can go back to the 'Disc' tab and click the 'GO!' button (or hit the 'Enter' or 'Return' key) to start the extraction.


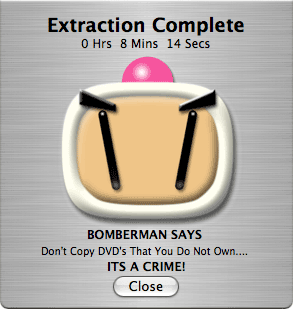
Step 3, finish extract movie from DVD.

You can find a folder in the save location. The output files extracted by MacTheRipper are saved as .VOB format .
Tip: RCE region protection
region 1: North America; U.S. territories; Bermuda
region 2: Europe; Western Asia; Kingdom of the Netherlands; Egypt, Japan, Lesotho, South Africa, Swaziland; British overseas territories, French overseas territories; Greenland.
region 3: East and Southeast Asia
region 4: Oceania; Central and South America; Caribbean; Mexico
region 5: Africa, Central and South Asia, Belarus, India, Mongolia, North Korea, Russia, Ukraine
region 6: Mainland China
Part 2. Convert the .VOB files to other video, audio formats compatible with iPod, PSP
After using Mac The Ripper to minus the copy protections, we can use Aiseesoft Video Converter for Mac to convert .VOB files to formats that compatible with popular players such as iPod, iPhone(iPhone 3G), Apple TV, PSP, Zune, etc.
Step 1:
Download and install Aiseesoft Video Converter for Mac
Note: If you just want to convert .vob file for iPod, You can choose this powerful iPod video converter for Mac. It can convert .VOB file to iPod video and iPod audio on Mac OS with powerful functions and fast converting speed!
Step 2:
Run Aiseesoft Video Converter for Mac, click 'Add File' button to import the .VOB files, choose the output format, then click 'Start' to start the conversion. If you want to put the video on PowerPoint, you can choose .avi as output format.
Tip: Aiseesoft DVD Ripper for Mac can rip DVD to all popular video and audio formats directly. It can rip DVD to videos including MP4, AVI, MOV, M4V, 3GP, MPG, MPEG, FLV, etc and can convert DVD audio to MP3, M4A, AAC, AC3, etc. It is more easy to use than Mac the ripper. You can download it for free and have a try.
Step 3:
After the conversion is finished, You can transfer the converted files to the players. For example, use iTunes to transfer the mp4 video to your iPod, here are the steps:
1. Open iTunes and click "File" to add your converted videos to iTunes library.
2. Plug in your iPod to computer, then iTunes will detect your iPod as a device.
3. Select your iPod device on the left panel of iTunes, click "Movies" tab, check the videos you want to sync and click "Apply", done.
Recommend: DVD Converter Suite for Mac: all-in-one solution to convert DVD and Video to MP4, AVI, FLV, MOV, MKV, ASF, directly for your iPhone, iPod, PSP, iPod touch, Zune, etc. on Mac OS X.
没有评论:
发表评论